Trying to think of a fun and creative gift idea to give someone for St. Patrick’s Day? Why not make up a decorative mason jar full of green and St. Patrick’s Day related goodies? This is a great idea for anyone, man, woman, or child, and the general mason jar gift idea can be used for any holiday and any special occasion. For this project, I chose to make up a jar for a tween/teen girl, putting in lots of cool things that she can wear and use to spice up St. Patrick’s Day. Here is a tutorial with pictures to help inspire your own ideas for creating a delightful St. Patrick’s Day mason jar craft gift.
Step One: Gather Supplies
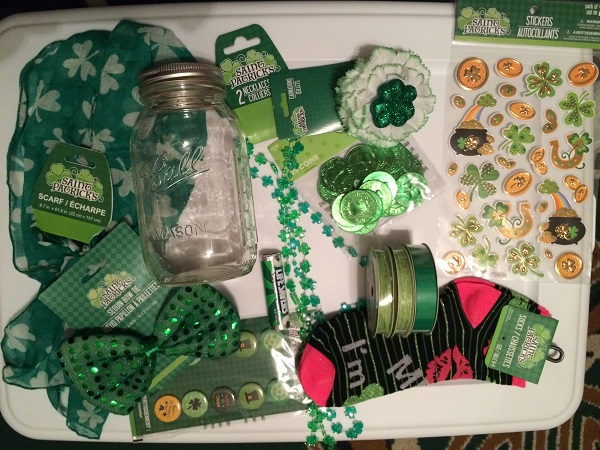
For my craft portion of the project, I used two spools of light green jute, a spool of dark green ribbon, and a package of St. Patrick’s Day shiny foil stickers. I also needed basic crafting supplies such as a hot glue gun and glue sticks, and scissors. For filling the jar, I bought several St. Patrick’s Day related items at the local dollar store and picked up a few items at the craft store. I included:
- Green plastic St. Patrick’s Day coins
- A green Shamrock scarf
- A fun pair of St. Patrick’s Day socks that say “(Lips for the word Kiss) Me I’m Irish”
- A green roll of wintergreen Life Savers candy
- A hair clip with a white carnation trimmed with green and a dark green Shamrock
- An assortment of St. Patrick’ Day pins
- A green sequined bow tie that fits with elastic
- Pack of two plastic green Shamrock necklaces
- One quart sized mason jar with canning ring and lid
Step Two: Decorate the Canning Lid
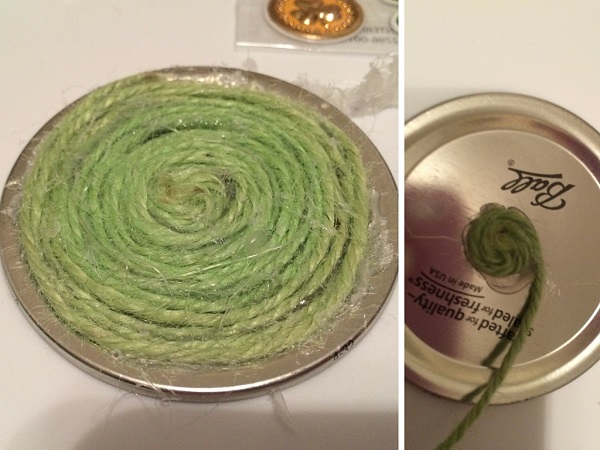
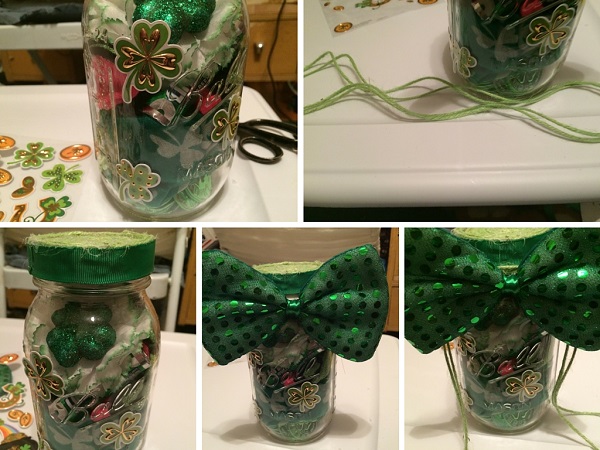
Remove the canning lid and ring from the mason jar. In the center of the lid, place a dab of hot glue. Then, place the jute in the center and begin wrapping it around itself in a circle. Place only a small amount of glue at a time and gradually continue wrapping the jute bit by bit until you reach the raised section of the jar lid. At this point, cut the jute and glue the end in place. Don’t wrap the entire section or else the canning ring will not fit around the lid. Set the lid aside for now and move on to the canning ring. Note that materials such as felt or fabric could be used instead of the jute for this step, I used the jute to add texture and a contrasting shade of green.
Note: When gluing the jute, the hot glue will dry on the canning lid almost immediately, so only use a bit of hot glue at a time so that you can quickly place the jute before it dries.
Step Three: Canning Ring Decoration
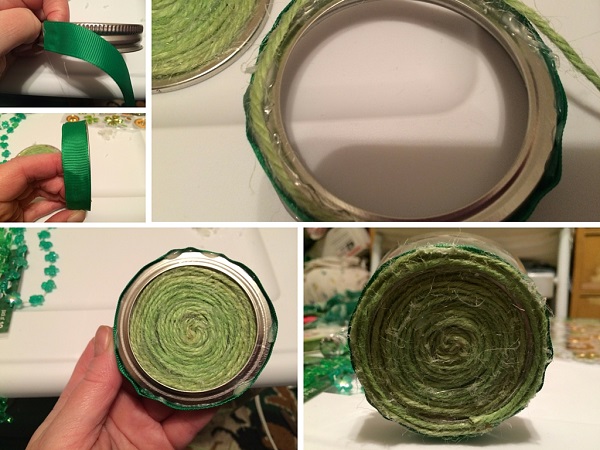
Take the canning ring and place a dab of hot glue on the side. Make sure to cover small sections of the ring surface at a time and carefully place the green ribbon along the edges. Continue placing and gluing the ribbon all the way around the ring. Cut the end and glue into place. Now, you will notice that some of the gold color is still showing at the top of the canning ring. This is an area that is just wide enough to wrap two rounds of the light green jute around. Glue the jute into place and glue bit by bit until all gold area is covered. When you place the canning ring and lid together now, it should look as if the jute is just one continuous circle that covers the entire top of the jar.
Step Four: Filling the Mason Jar
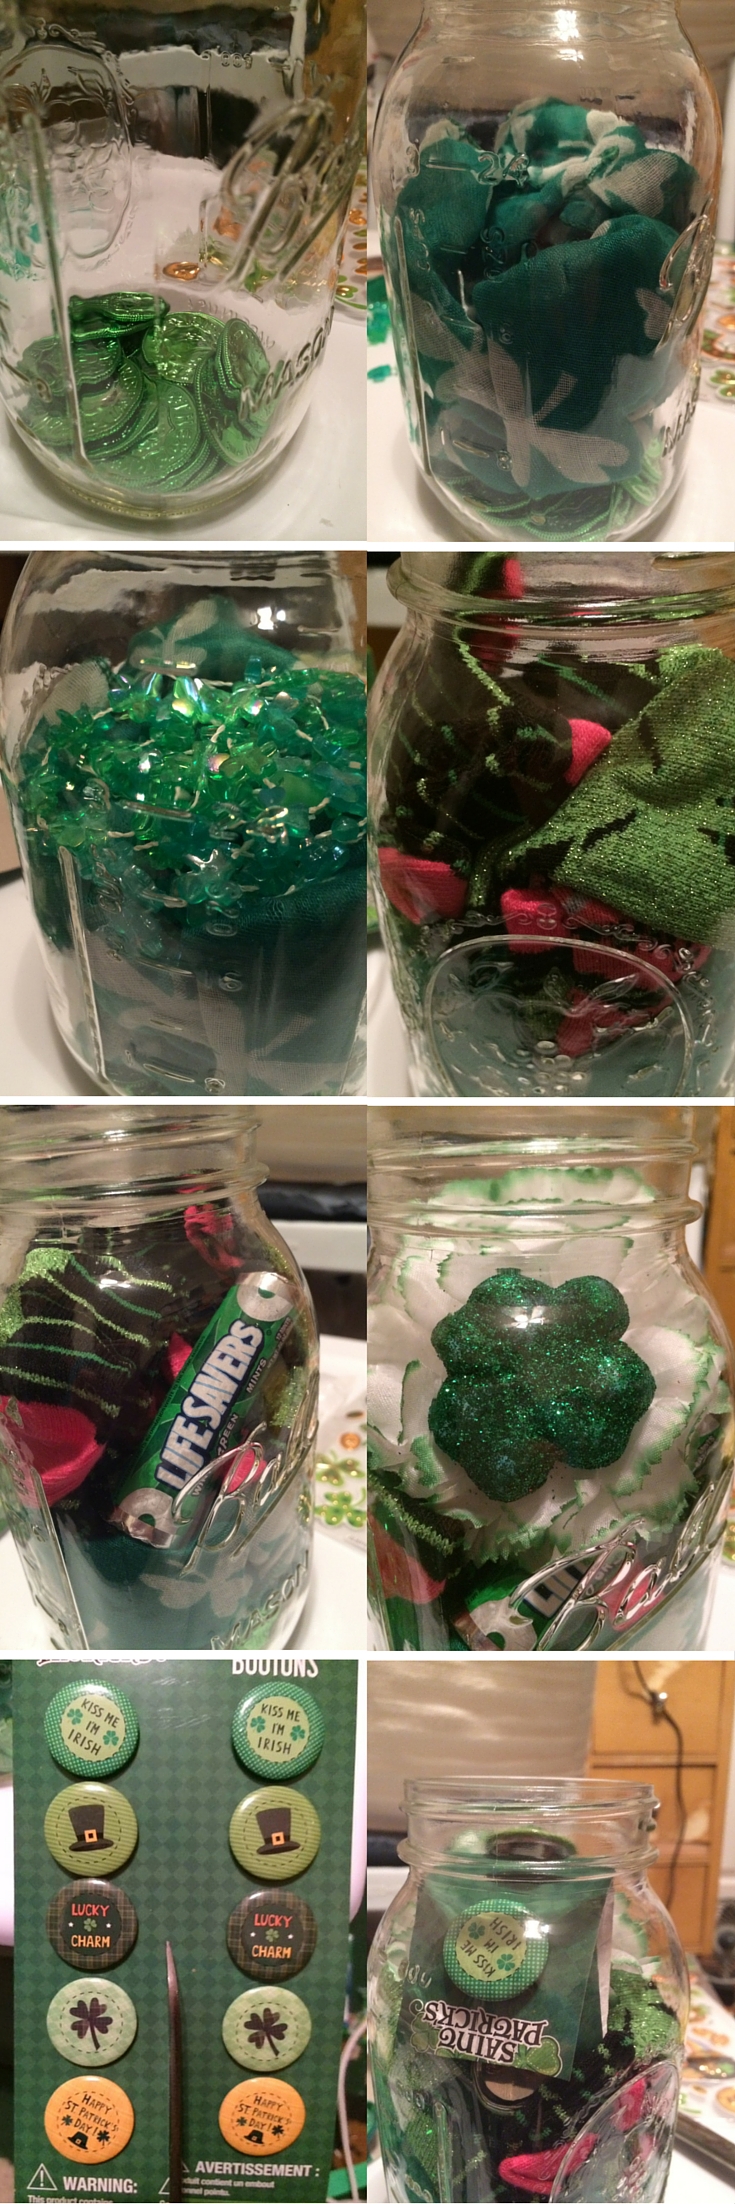
To start the filling process, I emptied the bag of green plastic coins into the bottom. They serve no real purpose other than that they are shiny and make a great decorative addition to the jar. I then layered the jar with items as I went along, next placing the green Shamrock scarf in. I then added the two Shamrock necklaces, then the cute socks. Next came the green Life Savers roll, then the carnation/Shamrock hair clip. The last thing I put in the jar was one section of the buttons that I simply cut in half from the cardboard they were packaged in. Then I rolled them up to fit at the top of the mason jar. Keep in mind, this jar theme is for a young tween/teen girl and has items that would appeal to her. Feel free to personalize the jar with whatever green and St. Patrick’s Day related items relate to the person for whom you are making the jar gift.
Note: Make sure to remove all cardboard and packaging materials from the items before filling the jar, as they take up valuable space.
Step Five: Finishing Touches
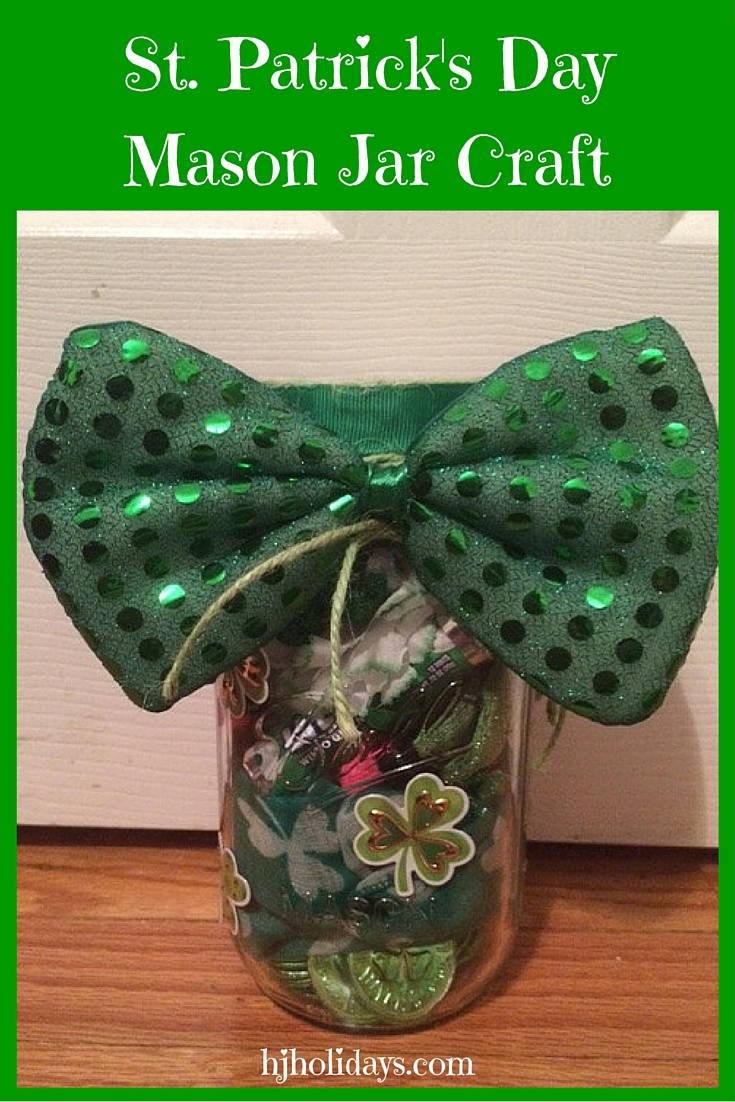
After filling the jar, replace the lid and canning ring. I decided to take some green and gold Shamrock stickers and place them here and there over the surface of the jar, still leaving plenty of room to view the goodies inside. I used seven stickers total to just add a little something but not enough to take away from the clear view inside. Then, I took the green sequined bow tie and wrapped it around the neck of the jar twice and centered it. I finished it up by cutting two long pieces of jute and wrapping them twice around the jar and tying them so that they hang near the center of the bow tie. You can use the jute to somewhat cover the white elastic from the bow tie (I noticed mine showed somewhat in the photo and I have since adjusted it a bit.)
This is a fun and simple craft where you can really use your imagination. Think of using a mason jar gift to present to someone as a baby shower gift, Easter gift, Birthday or Christmas present, etc. Mason jars can also be filled with edible ingredients with an included recipe, etc. The ideas on different ways to use this type of jar gift are endless.
Don’t forget to take a look at last year’s project: How to Catch a Leprechaun
