In addition to its religious meaning, Easter brings to mind thoughts of Spring, renewal, bunnies, chicks, eggs, and blooming flowers. It’s a time of year when the weather is becoming nicer and people are thinking in terms of bright and colorful, instead of the dreary and gray of a long winter. Easter is also a great time to begin some new craft projects. Make something with the kids, or perhaps create your own masterpiece to brighten up your home for the holiday. Here are some great Easter craft ideas for young and old alike.
Easter Egg Bouquet Craft Tutorial
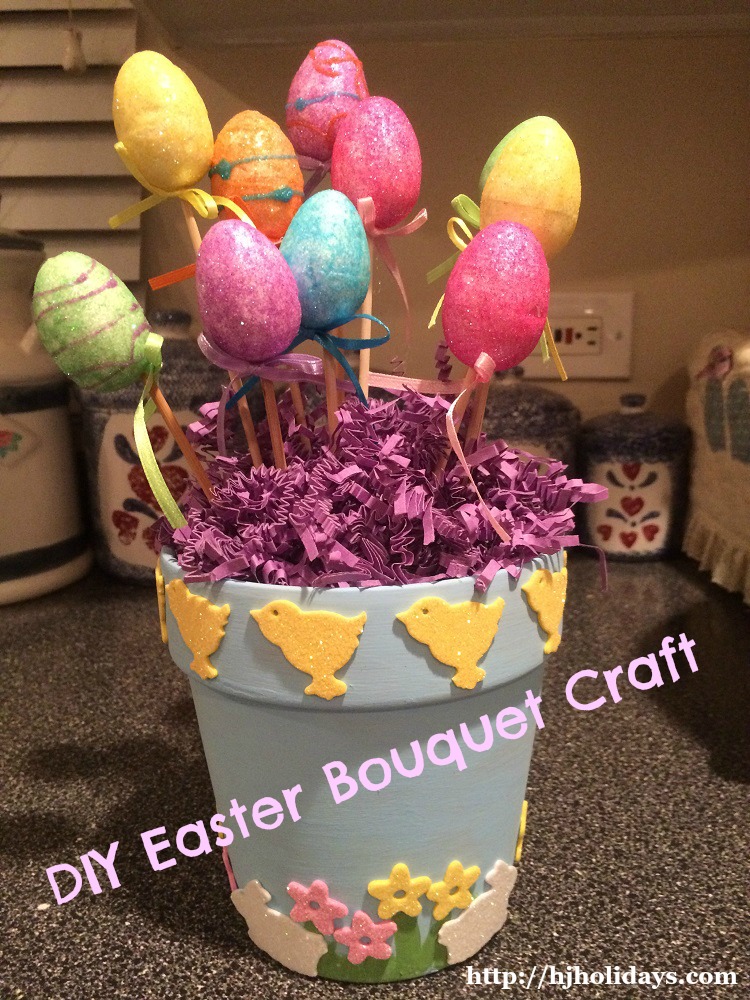
This cute little craft can be made for a few dollars using dollar store finds and paints and brushes from your craft supply stash.
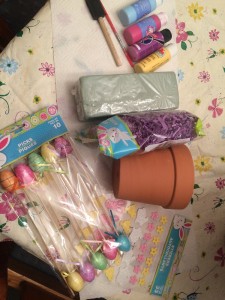 Materials Needed:
Gather all needed supplies before you begin.
- Terra-cotta flower pot (small)
- Easter egg picks (small eggs)Any color
- Easter grass (paper preferred over plastic)
- Package of assorted foam Easter stickers
- Pastel or brightly colored craft paints
- Sponge paintbrush
- Regular paintbrush
Instructions:
STEP ONE:
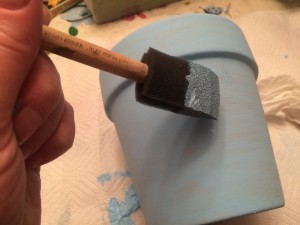
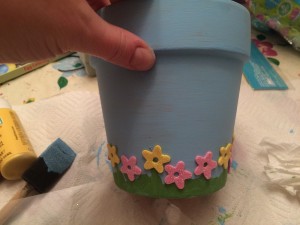
Paint the terra-cotta pot any color you would like. For mine, I chose a light blue to make an outdoor theme using the foam stickers I had found. You can paint and decorate the pot any way you choose to. Put about two or three coats of paint on the surface, allowing it a few minutes to dry between each coat.
STEP TWO:
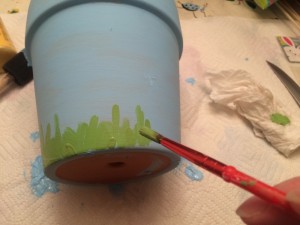
For mine, I painted “grass” using green craft paint all around the base of the pot. I painted the blades various lengths, as some will later be used as the “stems” of flowers.
STEP THREE:
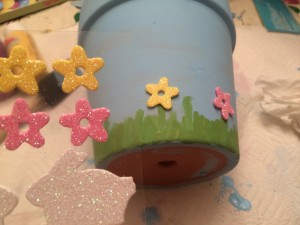
In my package of stickers, there were flower shapes. I began sticking them along the grassy area at the bottom of the pot, all the way around, leaving space near the bottom to later place the bunny stickers. (You may use any type of foam Easter stickers if you cannot find these exact ones, just be creative!)
STEP FOUR:
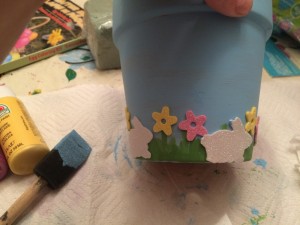
Place white sitting bunny foam stickers at intervals along the “grassy” bottom of the pot.
STEP FIVE:
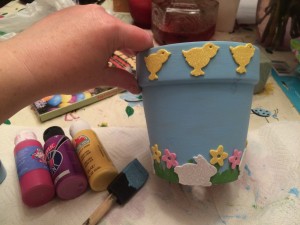
Taking the yellow chick stickers from the package, place them around the lip of the terra-cotta pot to creative a pretty chick border.
STEP SIX:
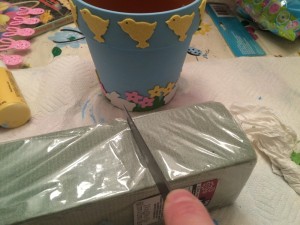
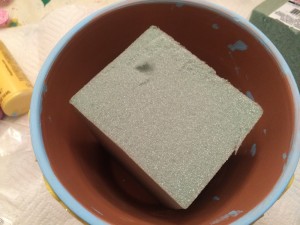
Taking your craft foam block, cut it so that it is just barely shorter than the top of the pot. Place cut piece of foam into pot, may be glued if necessary.
STEP SEVEN:
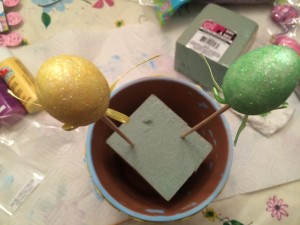
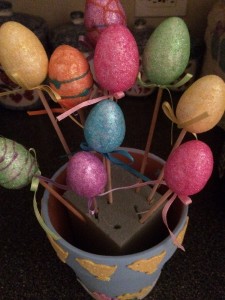
Begin sticking the full length egg picks around the back of the foam. Then, break off some of the sticks to make them a couple inches shorter. Arrange the various lengths and colors just as you would if they were actual flowers, making a neat, colorful arrangement.
STEP EIGHT:
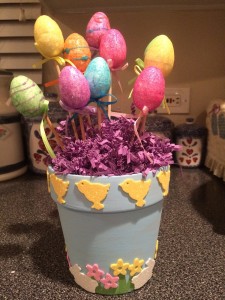
Next, add the colorful Easter grass and place in the empty parts of the pot to fill it all in, as well as covering the top so that no foam is showing. Allow grass to peek out over the top of the pot about an inch so that you can see it.
Now you have a cute little centerpiece decoration. Remember, when painting and decorating the terra-cotta pot, use whatever colors you choose, as well as stickers, or anything else that comes to mind. You could paint various designs on the pot, or think of a ton of other ideas to make it unique.
0000000000000000000
Here is a roundup of other Easter crafts for you to do with your family this Easter.
Peeps Centerpiece
Everyone is familiar with the colorful marshmallow candies we see at Easter known as Peeps. Not only are they Easter basket essentials, they can also be used to create a great craft project to use as a colorful centerpiece. All that is needed is clear vase with a mouth wide enough to slip in a smaller clear jar or vase. Simply arranged the candy in a decorative way between the two layers of glass, and fill the inner jar or vase with water and add a fresh springtime floral bouquet. Makes an inexpensive and easy decorative centerpiece for the table.
Easter Eggs Napkin Rings
These little napkin rings are a great craft project for kids that allows them to contribute in decorating the family table for Easter dinner. All you need are paper towel or toilet paper rolls, scissors, paint, brush, hole punch, and sticky back foam or regular craft foam in assorted bright colors. Simply cut off sections of cardboard rolls to pieces about one and one fourth inches thick. Then create an oval pattern in an egg shape and trace it onto colorful foam. Paint the paper rolls if desired and let dry. Cut out and decorate the eggs and glue them onto the dried roll sections. Add punched out dots of another color foam and stick or glue on. A cute way to let the kids help in the holiday decorating while allowing them to be creative.
Easter Bunny Sock Puppet
This puppet is super easy and the kids will love it! Simply take a clean, long, white sock and cut it with the heel section facing up. Cut several inches down the middle in the toe area and sew together to have two equal “ears”. Have the kids glue on googly eyes and a small pink triangular piece for the nose. A fun and easy puppet the kids will love.
Yarn Egg Wreath
This is a step by step tutorial with photos showing how to create a beautiful wreath using a foam wreath base, plastic eggs, and yarn. A great way to use up those pastel colored yarn scraps and create a stunning project to hang on the front door, above the mantel, or wherever you like.
Crochet Easter Eggs
These pretty crochet Easter eggs are made with a size F crochet hook, worsted weight yarn, yarn needle, and fiberfill. Complete pattern is provided on website. These make great gifts and could even be given to small children if no small parts were included in the design.
Stained Glass Easter Window Decorations
With some white poster board, an Exacto knife, glue, and colored sheets of cellophane, kids and parents can work together to create beautiful window decorations that look like stained glass. Parental supervision is required! Full instructions are provided here.
Beaded Egg Craft
Create beautiful beaded eggs by using foam eggs, sequins, seed beads, and straight pins. Work a decorative pattern all around the egg using various colored sequins and beads. The possibilities are endless. Create several to display in a shallow basket for Easter decor for the home, or make to give as gifts. Directions and photo tutorial.
Pop Bottle Easter Basket
This beautiful Easter basket is created from an empty two liter soda bottle, batting, fabric, lace trim, ribbon, and glue. Some simple sewing is required, either by machine or hand sewing with needle and thread. The base of the bottle serves as the basket, while a cut piece of plastic makes the handle.
Paper Plate Easter Bunny Craft
A simple craft that kids will love! Use a paper plate, white poster board, pink construction paper, pipe cleaners, pom poms, and googly eyes to create a classic Easter craft. Full list of materials needed and complete instructions here.
Easter Egg Tree Tutorial
This cute little Easter egg tree is made with simple dollar store finds. With a foam cone, green Easter grass, hot glue gun, and sparkly plastic eggs, you can create this cute little decoration, and the kids can help with most of it.
