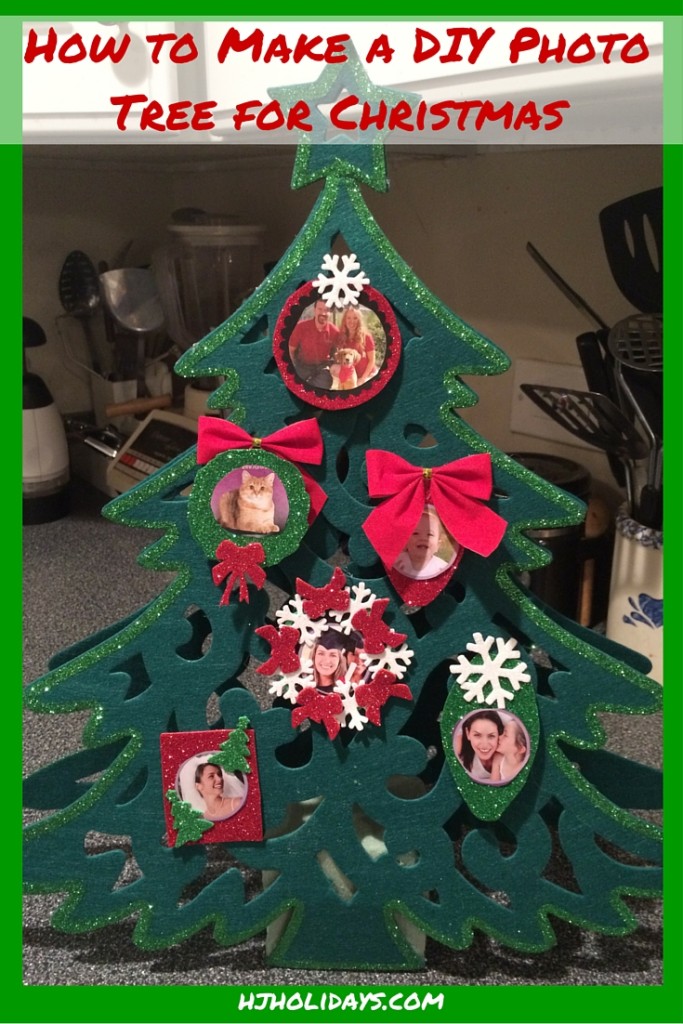
Photo trees are an interesting and attractive way to display a variety of small photographs together in your home. While photo trees can be readily purchased, pre-made ones lack the personal touch that do it yourself projects have. Once you learn how to make a DIY photo tree for Christmas, you can create trees with specific themes and decide every aspect of how you want your photos to be displayed.
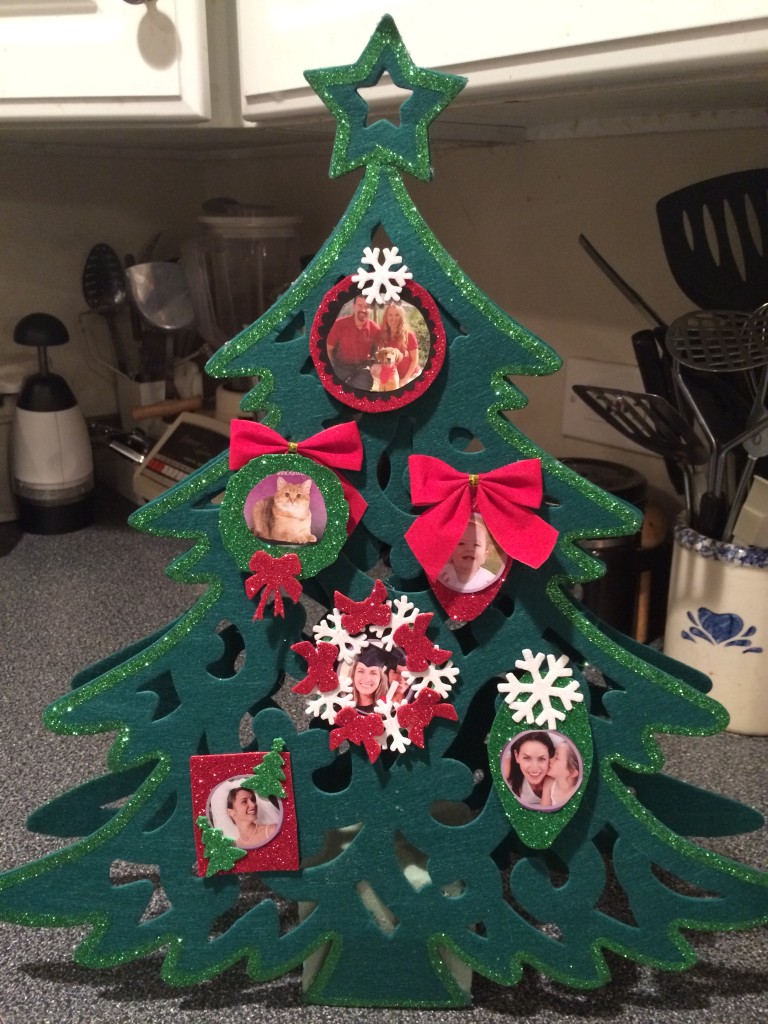
With the holidays approaching, a Christmas tree themed photo tree seems like a good choice. In this DIY photo tree project, I chose to create a double sided photo tree that is free standing. Two sides allow more room for photos and give it more of a Christmas tree appearance.
To display the photos, I opted to create “ornaments” using various craft supplies and display the photos in the center of them. For purposes of this project, I used a magazine with photos of random strangers for the tutorial, however, for your own you may wish to use a theme. For example, you may wish to use the Christmas tree photo tree to display photos specifically of Christmas memories from previous years, your children every year at Christmas or just a selection of some of your family favorites. Since a lot of cutting could be involved to make the photo fit it’s small “frame” on the photo tree, consider printing an extra copy of the photos to use specifically for this project. So, let’s get started!
++++++
1. Gather Your Supplies
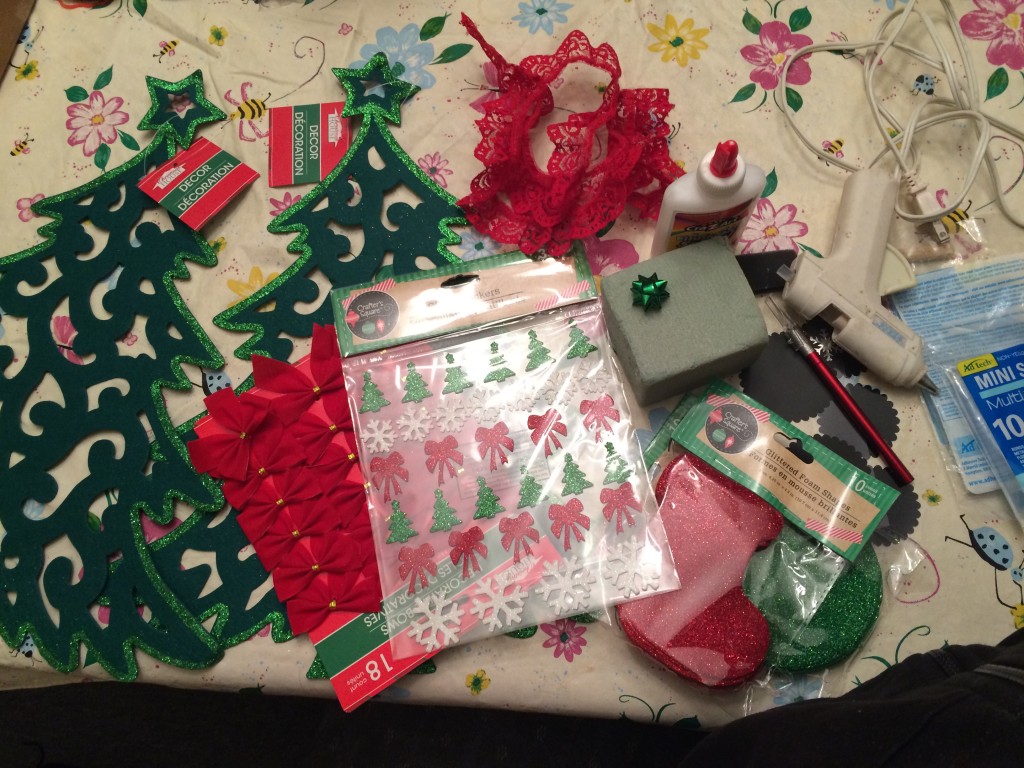
If you are an avid crafter and have done Christmas crafts over the years, you will likely have some supplies already on hand that you could use for this project. I set out several items I didn’t end up using, but could have used, such as tiny foil Christmas bows (sticky back type), felt squares, tiny foil snowflake cut outs, Mardi Gras type plastic beads (to use as garland around tree), etc. What I did end up using was two identical Christmas tree shaped sturdy felt cut outs (found at Dollar Tree), part of a green floral foam block, hot glue gun and glue sticks, tiny red velvet bows, red and green foam cut-outs with glitter on one side, scissors, and foam glitter stickers in assorted holiday shapes.
2. Assemble Tree and Stand
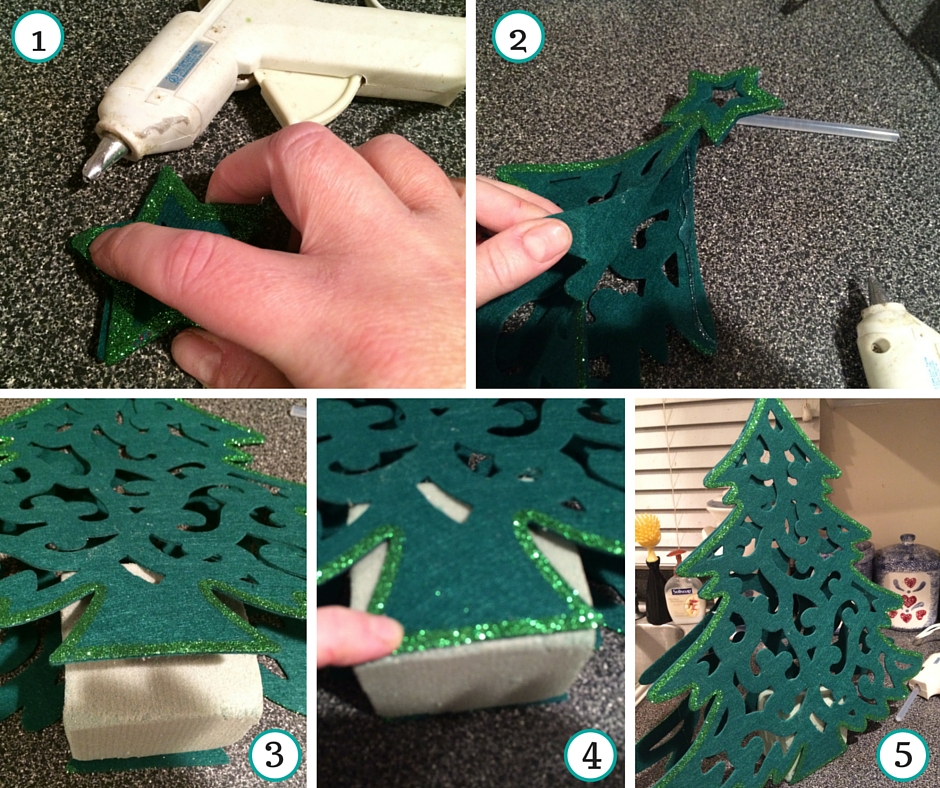
- To get started on the project, take both of the green tree cut outs and place them back to back, plain side to plain side, with both glitter trimmed sides showing.
- With glue gun, join the stars on the top of tree and glue them together at each point.
- Next, glue the first two tiers of the branches at the “V” shaped corners. Leave the rest of the tiers of branches unglued.
- Either purchase a green square floral foam block about the size of a Rubik’s Cube toy, or cut a larger foam block to size. For this craft, you will want the square to be as wide at the bottom as the base of the tree on each side.
- Use the glue gun to glue the very bottom of each tree base to the very bottom of the foam cube. This will allow the tree to be free standing and display in such as way so that both sides can be shown.
If you are unable to find tree cut outs like the ones shown, or some that are similar and will work for this project, there are simple ways to make them using other materials.
- Trace a simple tree pattern on either card stock or poster board, then cut out two of these.
- Trace and cut out two green pieces of felt or green craft foam using this pattern.
- Using school glue, slather entire side of card stock or poster board with glue and then place felt or craft foam over the top.
- Do this for the second piece as well and allow to dry.
- After pieces have dried, proceed with tutorial instructions as provided.
3. Make Your Photo Ornaments
For this tutorial, I made six different ornament shapes. Use these examples to inspire creative ideas of your own, as so many different materials could be used, the possibilities are endless. Here is a brief explanation on how I made each ornament.
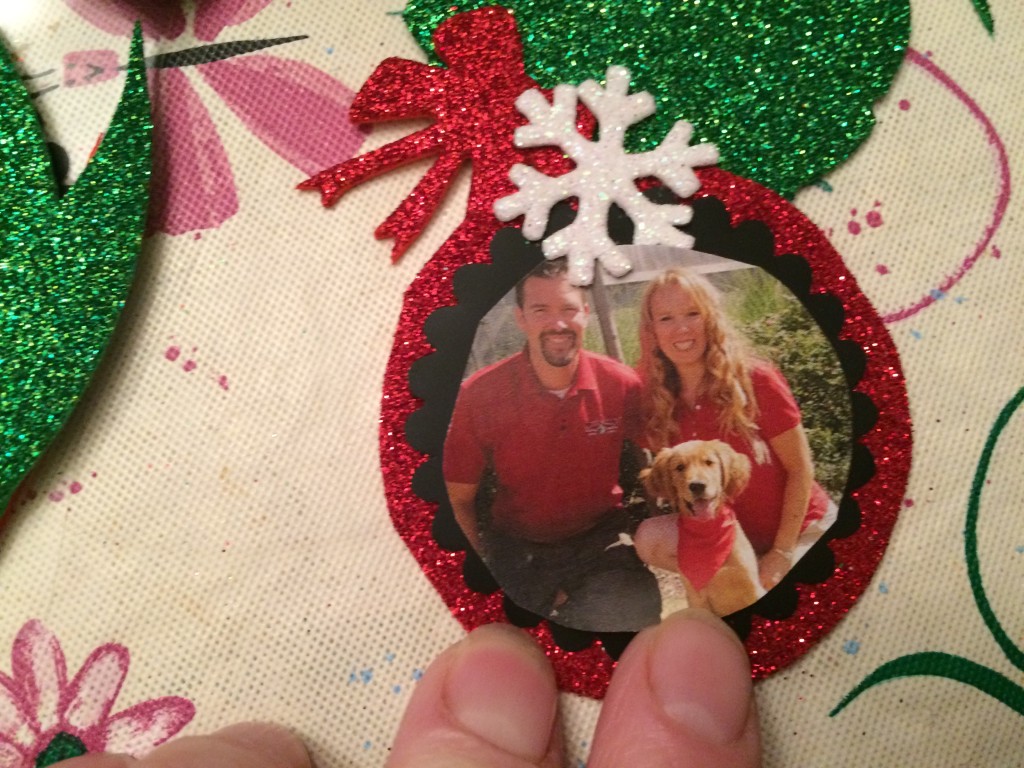
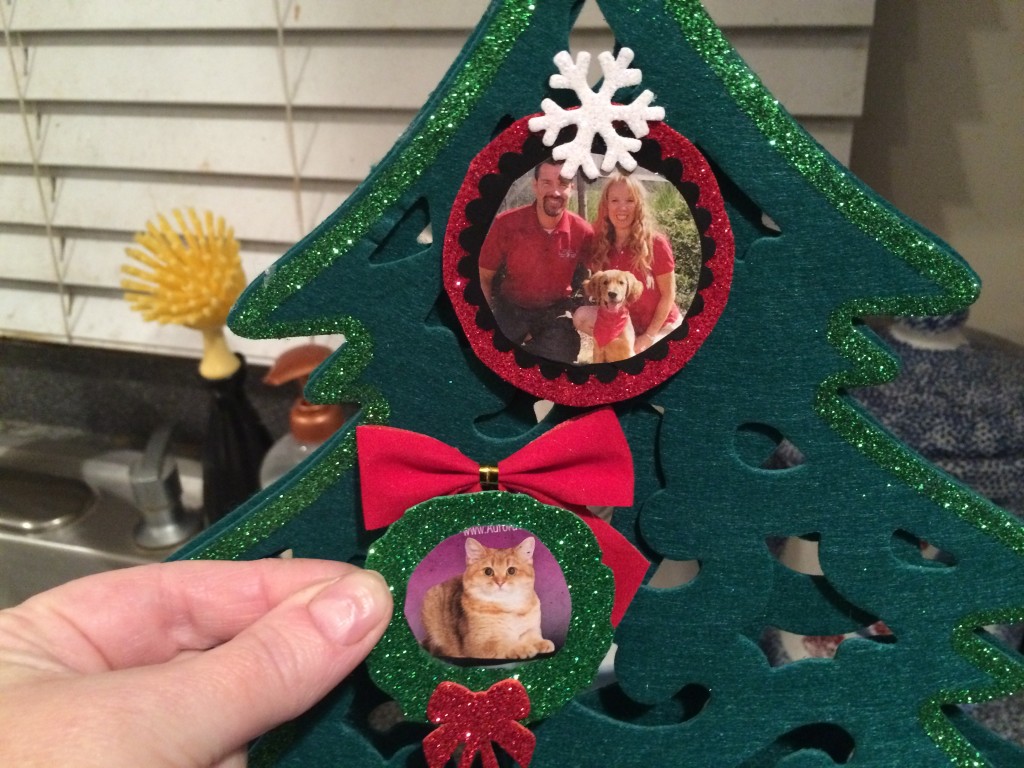
Red and Black Circle Ornament with Snowflake
This ornament was made by cutting out a red glitter foam square. The package I bought had all red stocking shapes, but I bought them to cut and use to create ornaments for this craft. First, I cut a red circle and then added a black circle with scalloped edges which was actually a chalkboard sticker left over from another craft project. Then, I cut out and pasted the photo within the black circle for a three layered effect. Afterwards, I added a white foam snowflake at the top.
Kitty Inside Wreath Ornament
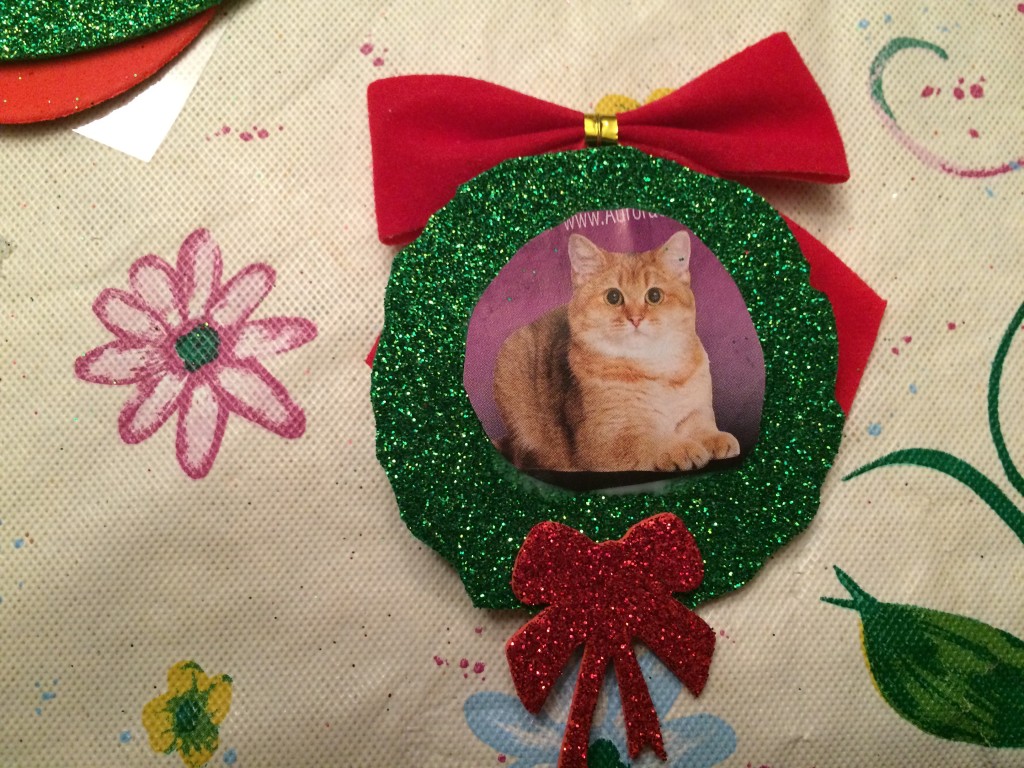
For this one, I cut out a wreath shape from the green glittered foam pieces I bought. I added a red glitter foam bow at the bottom, and glued an actual red velvet bow at the top, somewhat behind the green wreath. In the middle I placed a cute picture of a kitty.
Red Bulb with Baby and Bow
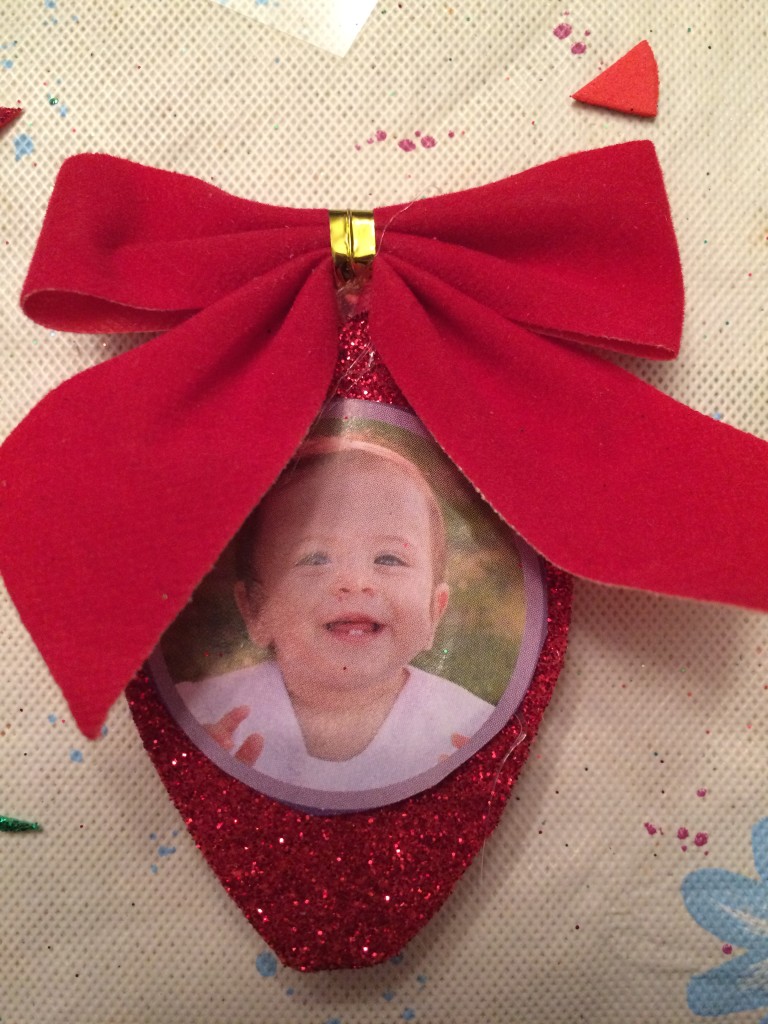
For this photo ornament, I simply cut a Christmas bulb shape from the red glitter craft foam. I then pasted the photo in the center and added a red velvet bow at the top.
White Snowflake and Red Bows Ornament
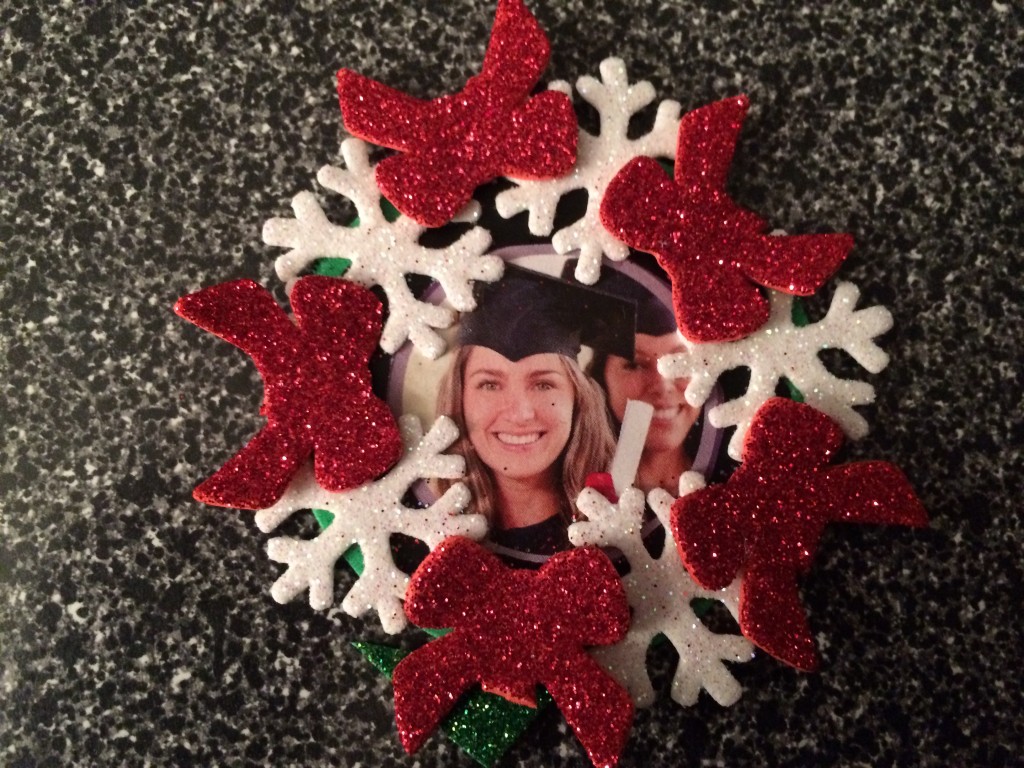
This photo ornament started out as a foam craft circle with a picture pasted in the middle. I added white foam snowflake sticky cut outs at even intervals all the way around the circle. Then I went back and place red glitter craft foam bows in the spaces between the snowflakes. The foam bows had extra “ribbon” hanging down that didn’t look right on this ornament, so I snipped them off with the scissors.
Green Bulb with White Snowflake Ornament
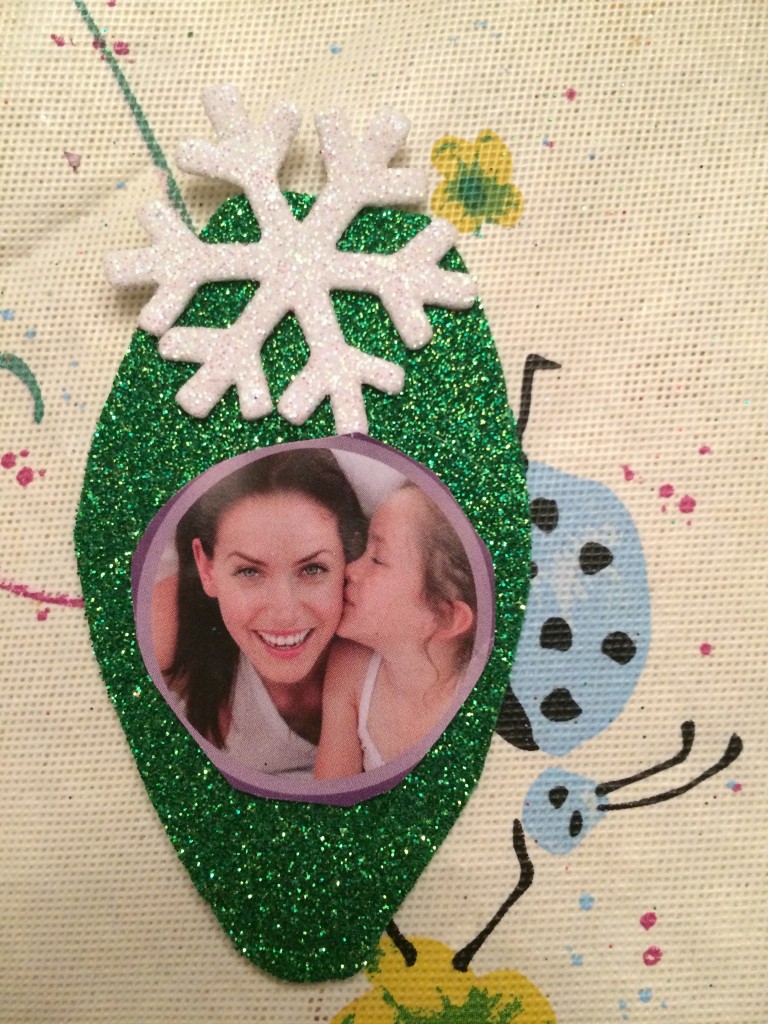
This is another simple green Christmas bulb shape cut from green glitter craft foam. A white snowflake was added to the top and a photo was pasted in the center of the bulb.
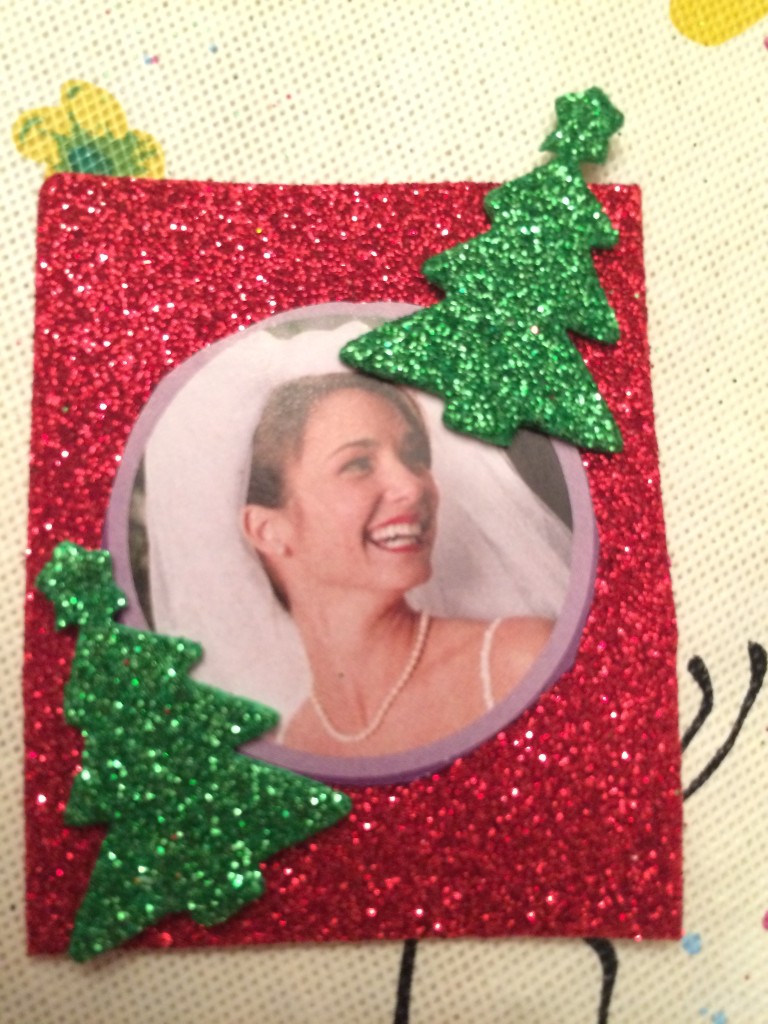
Red Square with Green Tree Accents Ornament
This was made by cutting a simple red square from the glitter foam, adding a photo in the center of the square, and then adding two green Christmas tree foam stickers at opposite corners.
4. Finishing the Tree
When all photos are ready to place on the tree, add a dab of hot glue to the top of each ornament, instead of gluing it flat surface fully to flat surface. This will give your tree more dimension and make it look more like a tree with ornaments hung. You now have a great DIY photo tree to display for the holidays.
Alternatives
With this project, possibilities abound. Consider using fabrics, different ways to construct the tree, printing all photos in black and white, etc. For this project, more and more photo ornaments could be made to cover the other side of the tree, or space could be saved to add photos from this year’s Christmas celebration. You can also make this project in another shape.
